Contact us
SKU: HEATMISERACTUATOR

Heatmiser TA230 Underfloor Heating Thermal Actuator

Sale price £11.29 Regular price £11.89 Inc VAT
Order in
00 00 00
for Next Day Delivery

Buy now, Pay with Klarna

Buy now, Pay with PayPal

Description

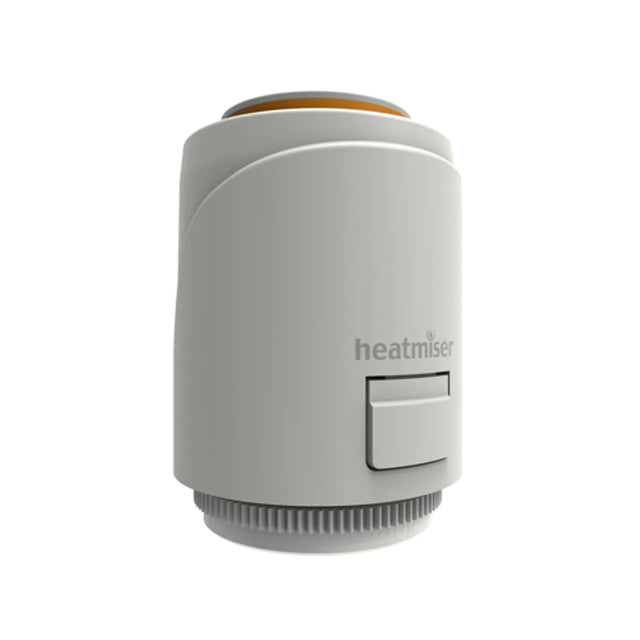
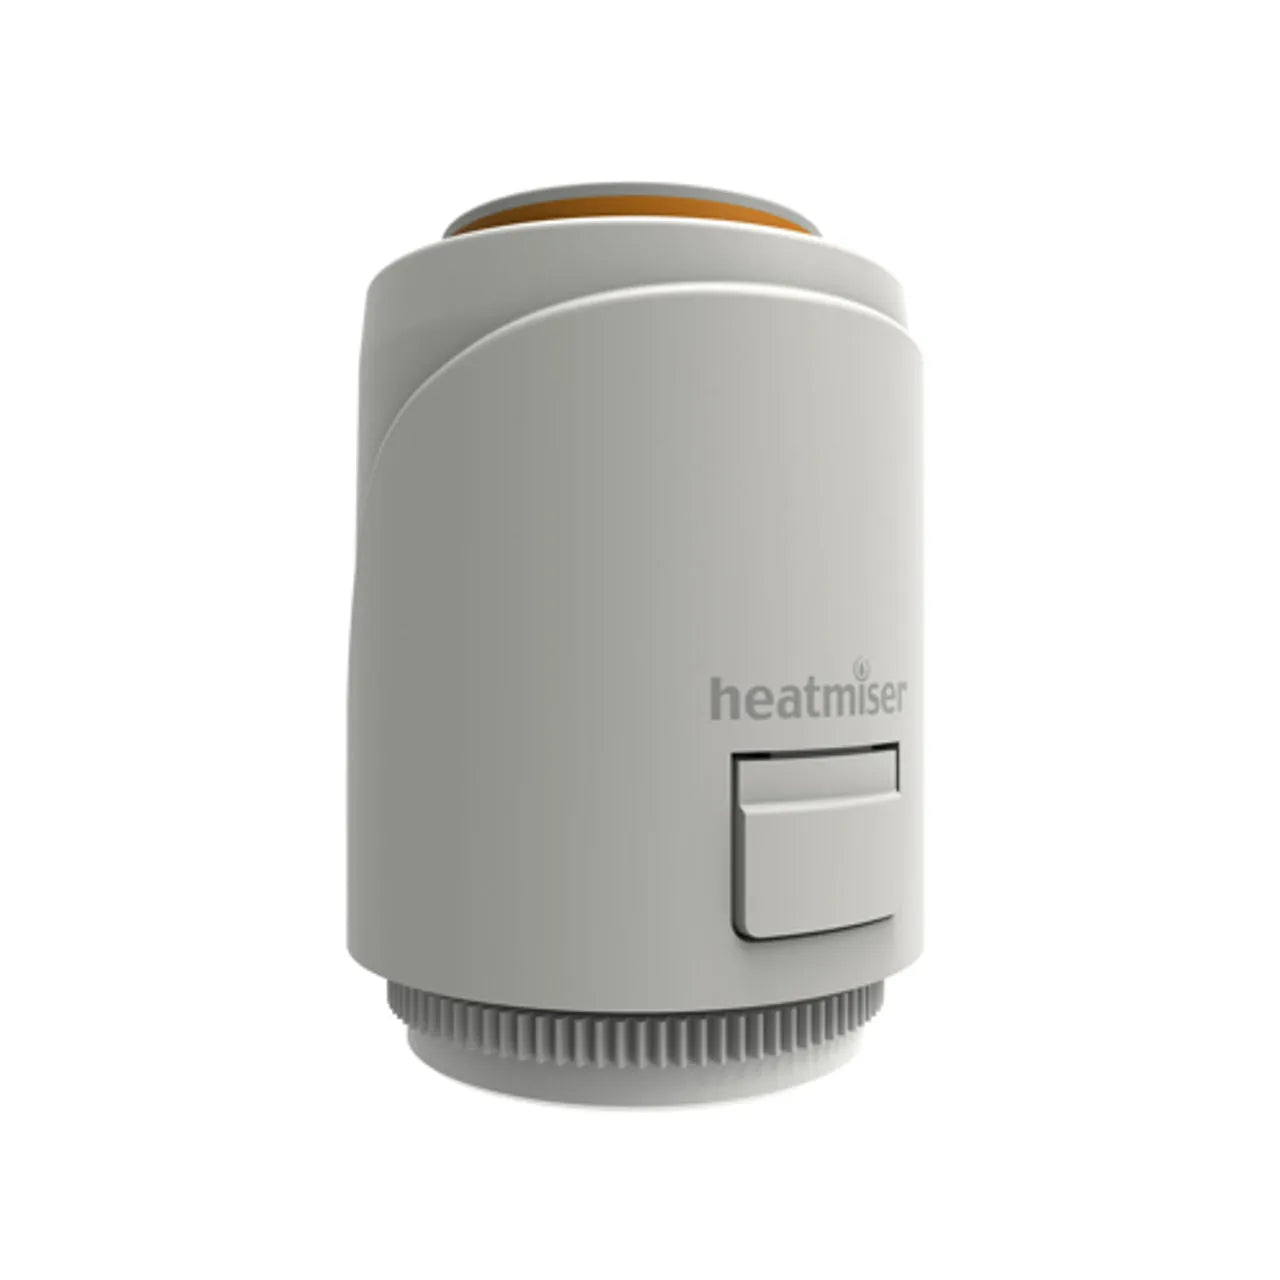
The Heatmiser TA230 Underfloor Heating Thermal Actuator is a reliable and efficient 2 wire thermal actuator specifically designed to control individual valves on a manifold system. When prompted by a room thermostat, the thermal actuator opens the valves, allowing for precise control of the heating in each room or zone.

To ensure seamless integration into your underfloor heating system, the Heatmiser thermal actuator is typically wired into an underfloor heating wiring centre, such as the Heatmiser UH4 or UH8. This enables centralized control and synchronization of the thermal actuators throughout the system, ensuring optimal performance and energy efficiency.

For convenient installation, the thermal actuator comes complete with a threaded ring nut M30 x 1.5. Prior to fitting the actuator, the threaded ring nut is securely screwed onto the manifold, providing a sturdy base for attaching the actuator. The actuator easily clips onto the threaded ring nut, streamlining the installation process and saving valuable time.

The Heatmiser thermal actuator operates on a 230v power supply, ensuring consistent and reliable performance. With its 2 wire normally closed configuration, the actuator efficiently controls the flow of heating water, allowing for precise temperature regulation and comfort control in each room or zone.

The stroke length of the thermal actuator is 3.5mm +/- 0.5, providing the necessary movement to open and close the valves with accuracy and precision. This ensures smooth and responsive operation, allowing for precise adjustment of the heating flow in response to the room thermostat signals.

Choose the Heatmiser thermal actuator - 2 Wire for your underfloor heating system and experience efficient, reliable, and customizable control of your heating zones. With its robust construction, convenient installation features, and compatibility with underfloor heating wiring centres, this thermal actuator is a valuable addition to any heating system.

Specifications

Power 230VAC
Consumption 2W
IP Protection IP54
Stroke 3.5mm +/- 0.5
Valve Connection Threaded Ring Nut M30 X 1.5
Opening Time Start: 120 seconds
Finish : 180 seconds
Weight 127g

Reviews

Specifications

Specifications

High-Quality Construction


  • ProWarm Electric Underfloor Heating Sticky Mat: Utilizes the same premium cable as the ProWarm Loose Cable kit. The mat incorporates a sticky fibreglass mesh to ensure optimal heat output by maintaining proper cable spacing. Installation is straightforward—simply roll out the mat to cover the desired heating area.

  • Heating Cable: Series-type with twin conductors and a 4m cold lead at one end.

  • Cable Composition: The resistance heating wire is encased in a fluoropolymer insulation layer, wrapped in protective metal shielding, and enclosed in a final plastic outer sheath. The twin conductor cable has a final diameter of 2mm.

  • Junction Design: Unique design for hot and cold lead junctions ensures they are 100% foolproof.

Standards and Approvals


  • Standards: Meets all test requirements of IEC 60335.

  • Certifications: CE certified by SGS.

Performance and Benefits


  • Cost-Effective: Provides heat precisely where needed, optimizing heat utilization and minimizing losses.

  • Flexibility: Can be installed in any area or floor layout.

  • Comfort: Close and uniform spacing of heating cables, combined with thermostat controls, allows for precise temperature settings, enhancing comfort.

  • DIY-Friendly: Designed for easy installation with clear instruction manuals and professional technical support.

  • Versatility: Available in various heat loads and sizes to suit various flooring types.

Mat Dimensions


  • Width: 0.5m

  • Length: Dependent on the selected square meter coverage

  • Cable thickness: 2mm

Kit Contents

Kit Includes:

  • Underfloor Heating Sticky Mat (Two individual mats if kit size over 12m2)
  • Floor Primer - a high-performance universal priming/sealing agent suitable for plaster, timber, brick, and block work.
  • Roller - a high-quality roller for applying floor primer to the subfloor
  • Adhesive tape - works to assist in holding a mat or cable in position during installation
  • 2m Floor Sensor Probe Conduit - provides a protective pathway for the sensor probe, connecting to your thermostat
  • Digital thermostat (if selected) - adjust the heat settings and enjoy warm floors through a simple touch of a button

Installation

Installation

Please Note: This is a brief guide. Always refer to the full installation manual for comprehensive instructions.

1. Plan Your Layout:

  • Divide the floor into a series of rectangles. Use these measurements to calculate the number and sizes of mats needed, excluding permanent or static fixtures from your calculations.

2. Prepare the Subfloor:

  • For screed over concrete floors, lay insulation boards to minimize heat loss and ensure quicker warm-up times.

3. Lay the Heating Mat:

  • Start with the first run of the mat. Cut the mat (leaving the cable intact) at the end of each run, turn it 90° or 180°, and continue laying.
  • Once the area is covered, adjust the mat so that the loops are evenly spaced.
  • Secure the mat to the subfloor using the special tape provided.

4. Electrical Connections:

  • Install an RCD fused spur to power the thermostatic controller/programmer and the mat system.
  • Lay the temperature probe from the timer-thermostat onto the floor, position it equidistant between two cable loops, and secure it to the surface.
  • Position the unheated power supply cable from the end of the mat system near the thermostat.
  • Make all necessary connections to the power supply. Run the heaters for no more than 10 minutes to ensure they are heating up properly.

5. Finish the Flooring:

  • Option 1: Apply a thin, self-levelling screed over the mat and allow it to dry completely before laying tiles.
  • Option 2: Directly trowel flexible tile adhesive over the mat and lay the floor tiles.
  • After grouting, let the tile adhesive cure fully before switching on the system.

Manuals

Payment & Security

Payment methods

  • American Express
  • Apple Pay
  • Diners Club
  • Discover
  • Google Pay
  • Klarna
  • Maestro
  • Mastercard
  • PayPal
  • Shop Pay
  • Union Pay
  • Visa

Your payment information is processed securely. We do not store credit card details nor have access to your credit card information.