Contact us
SKU: HX60/15W

Wavin Hep2O Pipe Insert 15mm - 50 Pack

Regular price £24.59 Inc VAT
Order in
00 00 00
for Next Day Delivery

Buy now, Pay with Klarna

Buy now, Pay with PayPal

Description

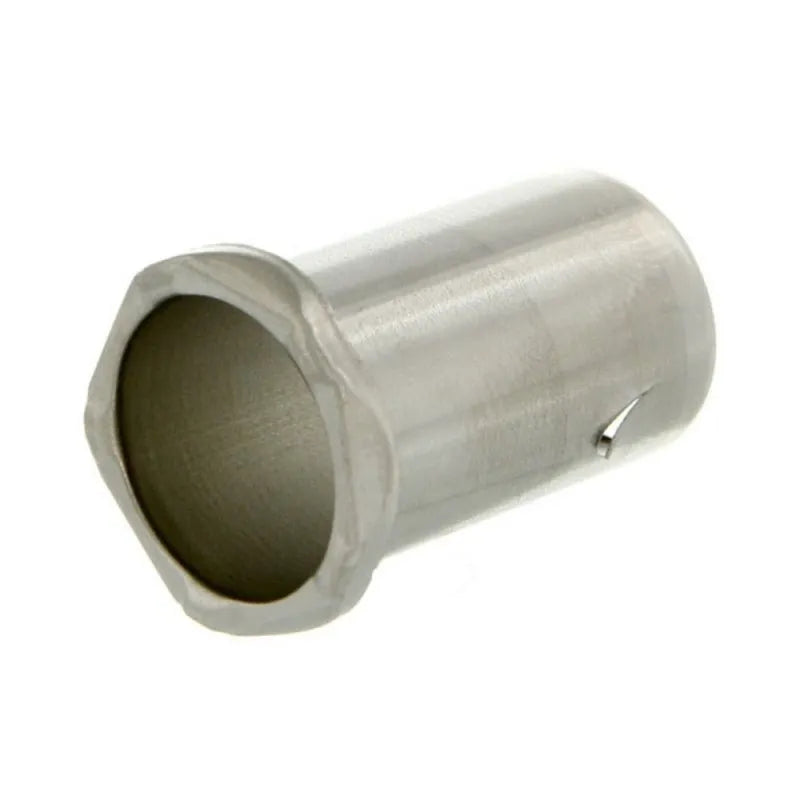
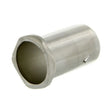
Make your plumbing projects more efficient with the Wavin Hep2O Pipe Insert 15mm - 50 Pack. This fitting is designed to save you both time and effort, thanks to its secure joint-recognition technology that reduces the risk of accidental demounting. Whether you're working on hot, cold, domestic, or underfloor heating systems, this pipe insert is the ideal choice for a secure and reliable connection.

Hep2O is a fully tried and tested system that has been the go-to choice for professional plumbers in the UK for over 30 years. With its track record of performance and reliability, you can trust Hep2O to deliver exceptional results.

The Wavin Hep2O Pipe Insert comes in a pack of 50, providing you with ample supply for your plumbing projects. The colour-coded packaging ensures easy identification, with green for 10mm, blue for 15mm, purple for 22mm, and orange for 28mm inserts.

When it comes to peace of mind, Wavin Hep2O has you covered. This pipe insert comes with a 50-year industry-leading guarantee, giving you confidence in its long-term performance and durability.

Conforming to the requirements for 'Class S' applications as set out in BS 7291:2010, the Wavin Hep2O Pipe Insert meets the highest quality standards. It is also WRAS approved, meeting the regulatory standards for water supply fittings.

Demounting is made secure and hassle-free with the innovative HepKey featuring an intuitive pipe release system. You can trust that your connections will remain secure during operation.

With the Wavin Hep2O Pipe Insert, you can expect flexible pipe that comes off the coil straight, making installation smoother and more convenient.

Feel confident in the reliability of your plumbing connections, as the Wavin Hep2O Pipe Insert ensures a leak-free connection. No more worries about unwanted leaks or water damage.

The In4Sure joint recognition technology further enhances the security of your joints, providing a secure and dependable connection every time.

To ensure a secure connection, insert the SmartSleeve into the Hep2O pipe. This additional feature adds an extra layer of reliability to your plumbing system.

Specifications

Diameter 15 mm
Length 29 mm
Connection Type Push-Fit
Material Stainless steel
Colour Natural
Years Guaranteed 50
Type End Fittings
Made To Order N
Manufacturer Model No HX60/15W
Country Origin Italy
Brand Name Hep2O
Range Description Pipe Insert

Reviews

Specifications

Specifications

High-Quality Construction


  • ProWarm Electric Underfloor Heating Sticky Mat: Utilizes the same premium cable as the ProWarm Loose Cable kit. The mat incorporates a sticky fibreglass mesh to ensure optimal heat output by maintaining proper cable spacing. Installation is straightforward—simply roll out the mat to cover the desired heating area.

  • Heating Cable: Series-type with twin conductors and a 4m cold lead at one end.

  • Cable Composition: The resistance heating wire is encased in a fluoropolymer insulation layer, wrapped in protective metal shielding, and enclosed in a final plastic outer sheath. The twin conductor cable has a final diameter of 2mm.

  • Junction Design: Unique design for hot and cold lead junctions ensures they are 100% foolproof.

Standards and Approvals


  • Standards: Meets all test requirements of IEC 60335.

  • Certifications: CE certified by SGS.

Performance and Benefits


  • Cost-Effective: Provides heat precisely where needed, optimizing heat utilization and minimizing losses.

  • Flexibility: Can be installed in any area or floor layout.

  • Comfort: Close and uniform spacing of heating cables, combined with thermostat controls, allows for precise temperature settings, enhancing comfort.

  • DIY-Friendly: Designed for easy installation with clear instruction manuals and professional technical support.

  • Versatility: Available in various heat loads and sizes to suit various flooring types.

Mat Dimensions


  • Width: 0.5m

  • Length: Dependent on the selected square meter coverage

  • Cable thickness: 2mm

Kit Contents

Kit Includes:

  • Underfloor Heating Sticky Mat (Two individual mats if kit size over 12m2)
  • Floor Primer - a high-performance universal priming/sealing agent suitable for plaster, timber, brick, and block work.
  • Roller - a high-quality roller for applying floor primer to the subfloor
  • Adhesive tape - works to assist in holding a mat or cable in position during installation
  • 2m Floor Sensor Probe Conduit - provides a protective pathway for the sensor probe, connecting to your thermostat
  • Digital thermostat (if selected) - adjust the heat settings and enjoy warm floors through a simple touch of a button

Installation

Installation

Please Note: This is a brief guide. Always refer to the full installation manual for comprehensive instructions.

1. Plan Your Layout:

  • Divide the floor into a series of rectangles. Use these measurements to calculate the number and sizes of mats needed, excluding permanent or static fixtures from your calculations.

2. Prepare the Subfloor:

  • For screed over concrete floors, lay insulation boards to minimize heat loss and ensure quicker warm-up times.

3. Lay the Heating Mat:

  • Start with the first run of the mat. Cut the mat (leaving the cable intact) at the end of each run, turn it 90° or 180°, and continue laying.
  • Once the area is covered, adjust the mat so that the loops are evenly spaced.
  • Secure the mat to the subfloor using the special tape provided.

4. Electrical Connections:

  • Install an RCD fused spur to power the thermostatic controller/programmer and the mat system.
  • Lay the temperature probe from the timer-thermostat onto the floor, position it equidistant between two cable loops, and secure it to the surface.
  • Position the unheated power supply cable from the end of the mat system near the thermostat.
  • Make all necessary connections to the power supply. Run the heaters for no more than 10 minutes to ensure they are heating up properly.

5. Finish the Flooring:

  • Option 1: Apply a thin, self-levelling screed over the mat and allow it to dry completely before laying tiles.
  • Option 2: Directly trowel flexible tile adhesive over the mat and lay the floor tiles.
  • After grouting, let the tile adhesive cure fully before switching on the system.

Payment & Security

Payment methods

  • American Express
  • Apple Pay
  • Diners Club
  • Discover
  • Google Pay
  • Klarna
  • Maestro
  • Mastercard
  • PayPal
  • Shop Pay
  • Union Pay
  • Visa

Your payment information is processed securely. We do not store credit card details nor have access to your credit card information.