

Heatmiser neoStat WiFi Thermostat
Description
Description
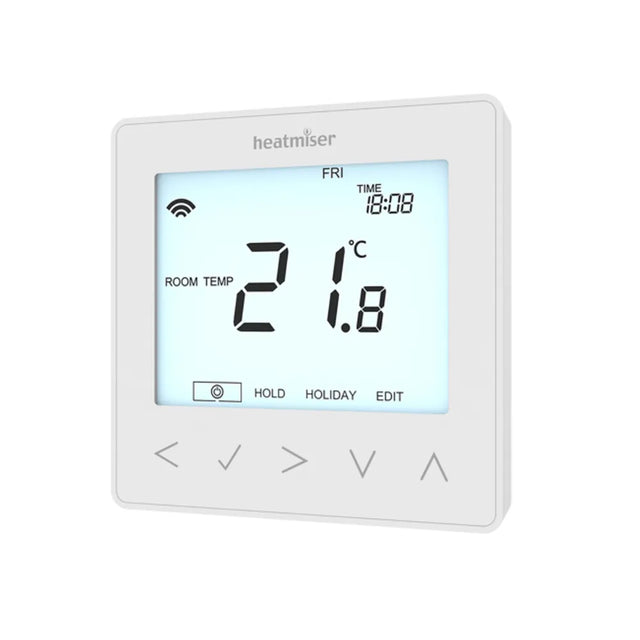
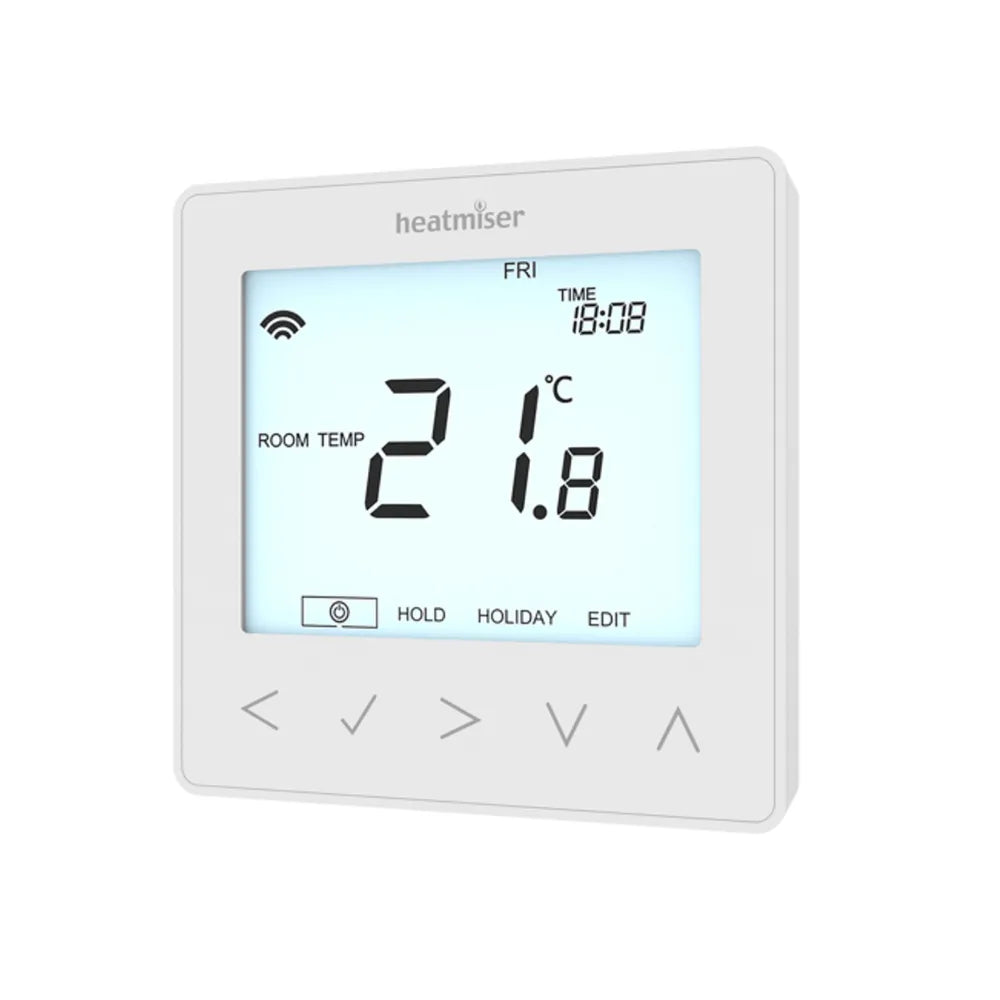
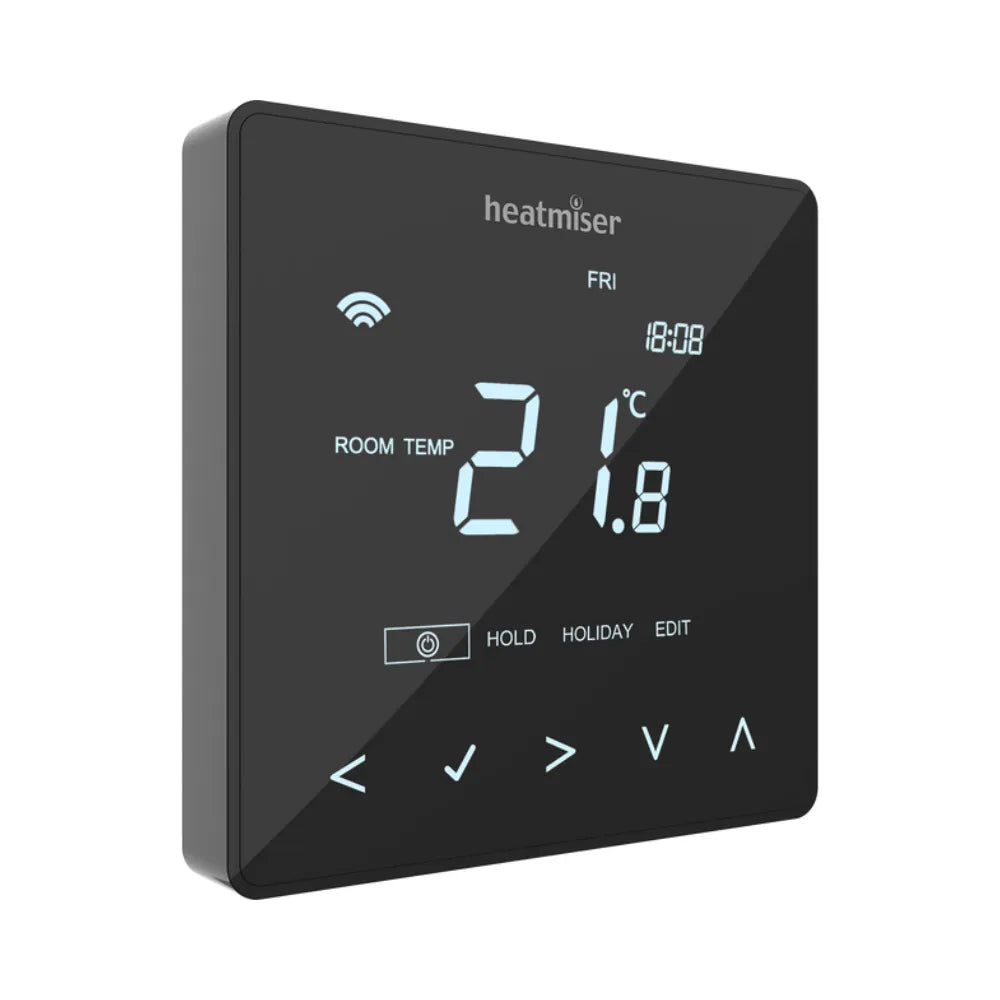
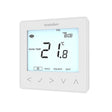
The Heatmiser neoStat WiFi Thermostat is a feature-rich 230v programmable thermostat with illuminated touch keys and built-in WiFi connectivity. With its versatile functionality, the neoStat WiFi can be configured as a programmable thermostat or a timer, allowing you to take control of various devices such as towel rails or lighting in addition to your heating system.
Key Features:
- WiFi Connectivity: The neoStat WiFi connects to your home broadband router, enabling remote control of your heating system from anywhere without the need for a separate hub.
- Smart Home Integration: Compatible with HomeKit, Google Home, IFTTT, and Alexa, the neoStat WiFi seamlessly integrates with popular smart home ecosystems, offering enhanced control and automation options.
- Enhanced History Support: The thermostat provides a 13-month history log that displays heating, preheating, and set/actual temperatures, allowing you to monitor and analyse your heating patterns.
- White Backlight with Proximity Sensor: The white model of the neoStat WiFi features a white backlight with a proximity sensor, providing clear visibility and easy operation in any lighting conditions.
- Backlight Dimming Function: The carbon black model of the neoStat WiFi offers a backlight dimming function, allowing you to adjust the display brightness according to your preference.
- Illuminated Soft Touch Keys with Proximity Sensor: The thermostat is equipped with illuminated soft-touch keys and a proximity sensor, ensuring intuitive and effortless operation.
- User Selectable Operating Modes: Choose from four operating modes - non-programmable, weekday/weekend, all days different, or all days the same - to tailor the thermostat's functionality to your specific scheduling needs.
- 5 Minute Program Intervals: The neoStat WiFi supports precise temperature control with 5-minute program intervals, allowing you to fine-tune your heating schedule.
- 0.5°C Set Temperature: Set your desired temperature with a 0.5°C precision, ensuring accurate and customized heating comfort.
- Self-Learning Optimum Start: The thermostat features a self-learning optimum start function that calculates the optimal heat-up time, ensuring your home is warm and cosy when you need it.
- 4 Comfort Levels per Day (Option for 6 with neoApp): Enjoy up to four comfort level settings per day, providing flexibility to adjust the temperature based on your daily routine. When paired with the neoApp, you can access six comfort levels.
- Temperature Hold Facility: The temperature hold feature allows you to temporarily lock the thermostat at a specific temperature, maintaining consistent heating according to your preference.
- Holiday Facility: The thermostat includes a holiday function that allows you to set a specific temperature while you're away, helping you save energy without compromising comfort.
- Flush Mounting: Designed for flush mounting, the neoStat WiFi seamlessly blends into your home decor for a clean and stylish appearance.
- Celsius/Fahrenheit Selectable: Choose between Celsius or Fahrenheit temperature display based on your preference.
- Key Code Facility: The key code facility adds an extra layer of security, allowing you to set a code to restrict access and prevent unauthorized changes to the thermostat settings.
- Frost Protection: The thermostat provides frost protection to prevent freezing temperatures, ensuring the safety of your heating system.
Experience the convenience and control of the Heatmiser neoStat WiFi Thermostat. With its WiFi connectivity, versatile programming options, smart home integration, and advanced features, this thermostat offers effortless temperature control for optimal comfort and energy efficiency in your home.
Specifications
| Supply | 230v |
|---|---|
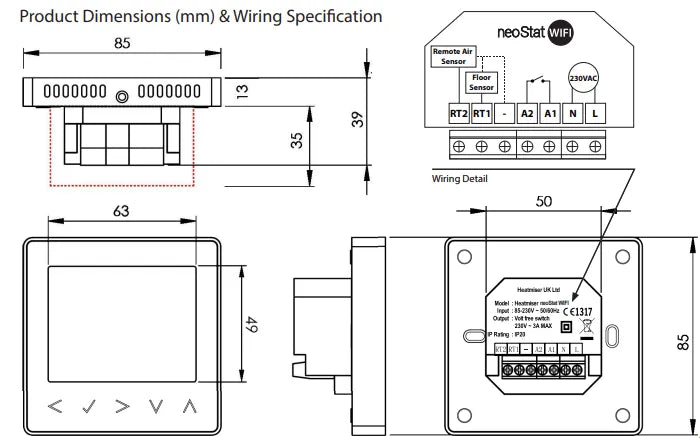
| Dimensions (L,H,D) | 85x85x15mm |
| Temperature Range | 05-45C |
| No. Heating Levels | 4Max |
| Current | Volt Free 3A |
| Optional Probe (not included) | Floor sensor or Room Sensor |
| Probe Rating | 10Kohm, 12Kohm, 15Kohm NTC |
| IP Rating | IP20 |
Reviews
Reviews
Payment & Security
Payment methods
Your payment information is processed securely. We do not store credit card details nor have access to your credit card information.
Not sure where to start? Let us help!
Answer a few questions and we’ll get you on your way