Contact us
We're here to help - speak to an expert today on 01268 567016. Open today until 6pm.
SKU: NEOKIT2-WHITEGEN2

Heatmiser neoKit2 Smart Heating Thermostat & Hub Kit

Sale price £189.99 Regular price £199.99 Inc VAT
Order in
00 00 00
for Next Day Delivery

Buy now, Pay with Klarna

Buy now, Pay with PayPal

Description

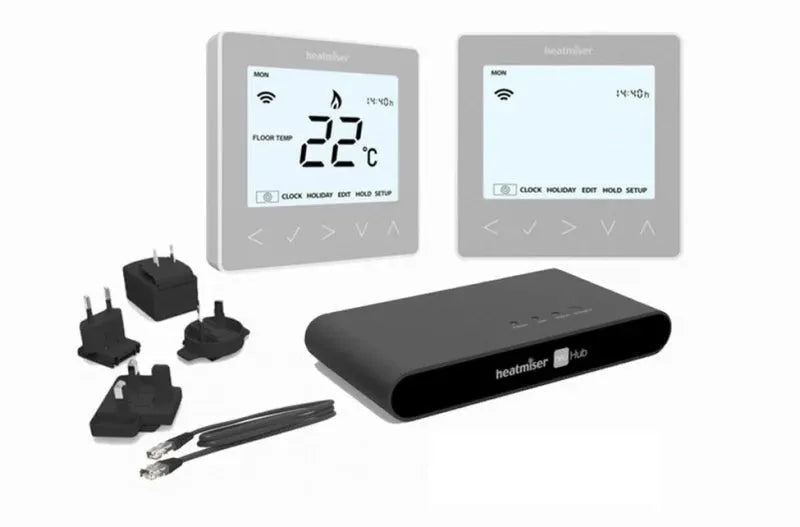
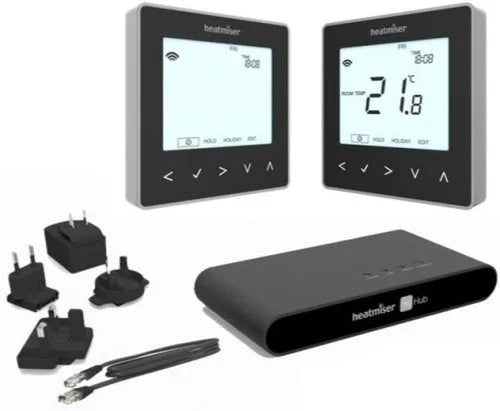
The Heatmiser neoKit2 Smart Heating Thermostat & Hub Kit includes 1 neoStat, 1 neoStat-hw and a neoHub (2nd generation), allowing you to take control of your heating and hot water from anywhere.

Heatmiser are proud to be one of the very first heating control manufacturer's to support HomeKit, the home automation platform from Apple.

HomeKit support offers:

Siri Voice Control: With HomeKit, you can ask Siri to set your Neo in each room to the desired temperature.

Control from inside iOS 10: HomeKit accessories, including Neo, can be controlled straight from the Control Centre in iOS 10. This means you no longer need to open the Neo app to make a quick temperature adjustment.

Automation Rules: Rules can be setup that can trigger Neo and your other HomeKit accessories. There are many triggers, but it could be when you arrive home, open a window or door or at sunset.

Scenes: A scene on HomeKit works across all of your HomeKit devices, setting up your Smart Home just got easier. A Movie Time scene could raise your Neo temperature, Lock the Doors and lower the blinds. Now that's smart!

System Features

  • HomeKit Enabled - The Secure Smart Home platform from Apple.
  • Geo-Location Facility Using your mobile phone position, Neo will automatically turn the heating off in your home when the last person has left and back on again when the first person is on their way home.
  • Apple Watch Compatible - Control your Neo System from your Apple Watch
  • IFTTT Compatible - Connecting Heatmiser to your Digital World.
  • UK/Euro/Australian Adaptor Included
  • Flexible Programming: Your neoStat can be setup to work in 5/2 day, 7 day or 24 hour mode. 5/2 is ideal for those with different weekday/weekend schedules. 7 day is great for those with different schedules each day and 24 hour mode offers the same settings for every day - so perfect for those at home most days.
  • Comfortable Temperature: 4 Comfort levels per day, so you can for example have your home warm when you wake, a little lower whilst you are out at work, warmer in the evening whilst you relax and reduced further throughout the night whilst you sleep.
  • Easy Away - Turning your heating off shouldn't be difficult - if it is, you are less likely to do it. The easy Away feature in Neo allows you to switch your home heating off from anywhere. Even in Away mode, we have your home covered providing frost protection in your home.
  • Convenient Profiles - Re-programming your comfort levels as and when your schedule changes is a thing of the past. A profile is a set of comfort levels that you can activate at any time from the app.
  • Always Updated - Your neoHub will automatically download Feature enhancements and bug fixes, automatically updating all of your neoStats.
  • Clock Sync - Your neoHub will obtain the time from the internet and will automatically correct your neoStats based on your location.
  • Open API - The open API allows third party developers to integrate with the Heatmiser neoHub

Reviews

Specifications

Specifications

High-Quality Construction


  • ProWarm Electric Underfloor Heating Sticky Mat: Utilizes the same premium cable as the ProWarm Loose Cable kit. The mat incorporates a sticky fibreglass mesh to ensure optimal heat output by maintaining proper cable spacing. Installation is straightforward—simply roll out the mat to cover the desired heating area.

  • Heating Cable: Series-type with twin conductors and a 4m cold lead at one end.

  • Cable Composition: The resistance heating wire is encased in a fluoropolymer insulation layer, wrapped in protective metal shielding, and enclosed in a final plastic outer sheath. The twin conductor cable has a final diameter of 2mm.

  • Junction Design: Unique design for hot and cold lead junctions ensures they are 100% foolproof.

Standards and Approvals


  • Standards: Meets all test requirements of IEC 60335.

  • Certifications: CE certified by SGS.

Performance and Benefits


  • Cost-Effective: Provides heat precisely where needed, optimizing heat utilization and minimizing losses.

  • Flexibility: Can be installed in any area or floor layout.

  • Comfort: Close and uniform spacing of heating cables, combined with thermostat controls, allows for precise temperature settings, enhancing comfort.

  • DIY-Friendly: Designed for easy installation with clear instruction manuals and professional technical support.

  • Versatility: Available in various heat loads and sizes to suit various flooring types.

Mat Dimensions


  • Width: 0.5m

  • Length: Dependent on the selected square meter coverage

  • Cable thickness: 2mm

Kit Contents

Kit Includes:

  • Underfloor Heating Sticky Mat (Two individual mats if kit size over 12m2)
  • Floor Primer - a high-performance universal priming/sealing agent suitable for plaster, timber, brick, and block work.
  • Roller - a high-quality roller for applying floor primer to the subfloor
  • Adhesive tape - works to assist in holding a mat or cable in position during installation
  • 2m Floor Sensor Probe Conduit - provides a protective pathway for the sensor probe, connecting to your thermostat
  • Digital thermostat (if selected) - adjust the heat settings and enjoy warm floors through a simple touch of a button

Installation

Installation

Please Note: This is a brief guide. Always refer to the full installation manual for comprehensive instructions.

1. Plan Your Layout:

  • Divide the floor into a series of rectangles. Use these measurements to calculate the number and sizes of mats needed, excluding permanent or static fixtures from your calculations.

2. Prepare the Subfloor:

  • For screed over concrete floors, lay insulation boards to minimize heat loss and ensure quicker warm-up times.

3. Lay the Heating Mat:

  • Start with the first run of the mat. Cut the mat (leaving the cable intact) at the end of each run, turn it 90° or 180°, and continue laying.
  • Once the area is covered, adjust the mat so that the loops are evenly spaced.
  • Secure the mat to the subfloor using the special tape provided.

4. Electrical Connections:

  • Install an RCD fused spur to power the thermostatic controller/programmer and the mat system.
  • Lay the temperature probe from the timer-thermostat onto the floor, position it equidistant between two cable loops, and secure it to the surface.
  • Position the unheated power supply cable from the end of the mat system near the thermostat.
  • Make all necessary connections to the power supply. Run the heaters for no more than 10 minutes to ensure they are heating up properly.

5. Finish the Flooring:

  • Option 1: Apply a thin, self-levelling screed over the mat and allow it to dry completely before laying tiles.
  • Option 2: Directly trowel flexible tile adhesive over the mat and lay the floor tiles.
  • After grouting, let the tile adhesive cure fully before switching on the system.

Manuals

Payment & Security

Payment methods

  • American Express
  • Apple Pay
  • Diners Club
  • Discover
  • Google Pay
  • Klarna
  • Maestro
  • Mastercard
  • PayPal
  • Shop Pay
  • Union Pay
  • Visa

Your payment information is processed securely. We do not store credit card details nor have access to your credit card information.