Contact us
SKU: LEVELITTWOPALLET

UltraTile ProLevel Two 2-Part Floor Self Levelling Compound - Pallet of 48 Bags

Sale price £664.99 Regular price £699.99 Inc VAT
Order in
00 00 00
for Next Day Delivery

Buy now, Pay with Klarna

Buy now, Pay with PayPal

Description

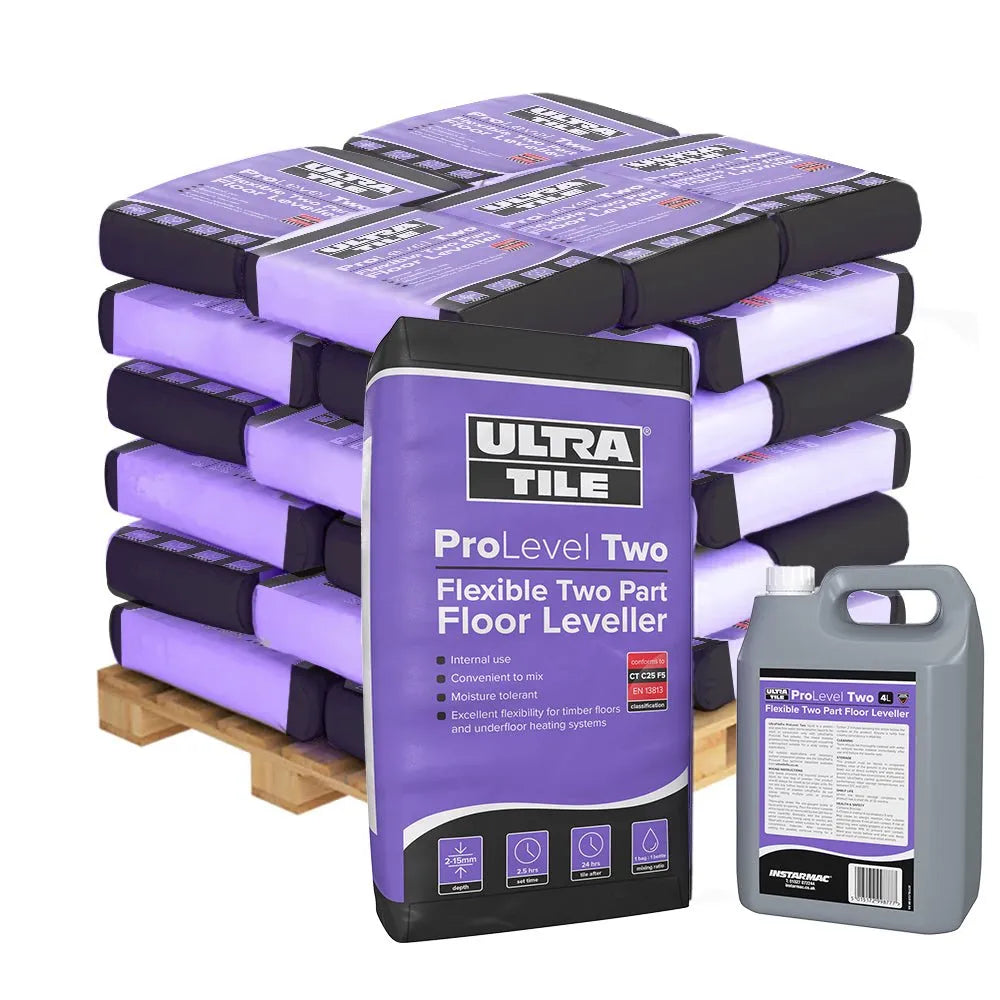
UltraTile ProLevel Two 2-Part Floor Self Levelling Compound - Pallet 48 Bags is a general purpose, mid strength two-part smoothing underlayment. Its exceptional flow characteristics make it a very easy smoothing underlayment to apply to a variety of subfloors in both commercial and domestic flooring projects.

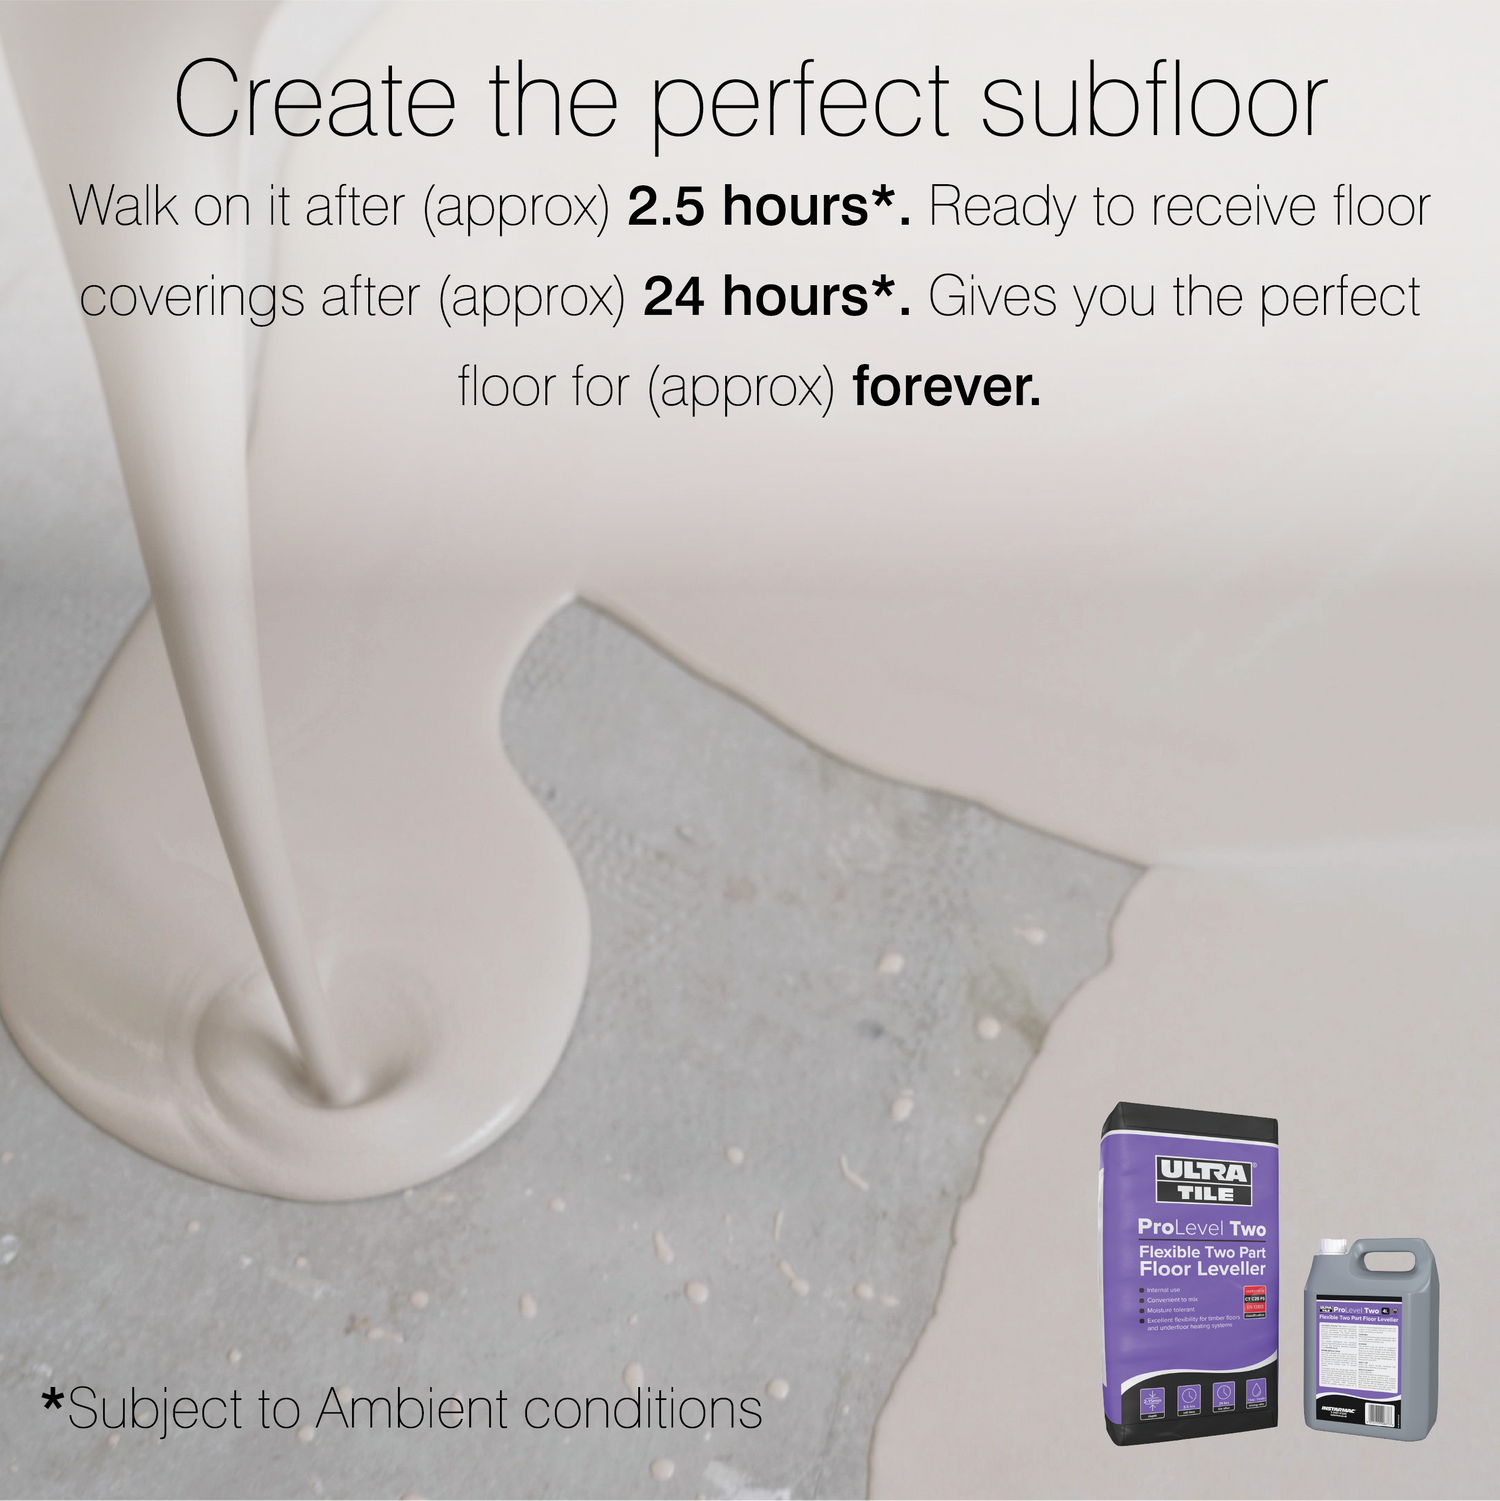
It has a typical working time of 20 to 30 minutes and a walk on time of approximately 2.5 hours. A 3mm application of Level IT TWO allows most floor coverings to be laid in as little as 12 hours (all based on good ambient conditions). It has a moisture tolerant formulation making it suitable for pre-smoothing of floors prior to applications of surface DPMs.

  • Versatile
  • Ready to receive floor coverings after 12 hours
  • Protein free
  • 2-10mm depth
  • Superior flow
  • Moisture tolerant

Specifications

Compressive Strength
(to BS EN 13892-2)
?
28 Days 31.25 N/mm2
7 Days 22.30 N/mm2
1 Day 8.17 N/mm2
Flexural Strength(to BS EN 13892-2) ?
28 Days 10.17 N/mm2
7 Days 4.61 N/mm2
1 Day 2.03 N/mm2
Packaging 4ltr Bottle / 20kg Bag
Working Time 20-30 Minutes @ 20°C
Time to Foot Traffic 2.5 Hours @ 20°C
Time to Cover 1 Day up to 6mm
3 Days up to 10mm
Application Thickness 2-12mm
Protein Free Yes
Coverage @ 3mm Approximately 4m2
Consumption/mm Thickness 1.60kg/mm/m2
Suitable for Pump Application No

Reviews

Specifications

Specifications

High-Quality Construction


  • ProWarm Electric Underfloor Heating Sticky Mat: Utilizes the same premium cable as the ProWarm Loose Cable kit. The mat incorporates a sticky fibreglass mesh to ensure optimal heat output by maintaining proper cable spacing. Installation is straightforward—simply roll out the mat to cover the desired heating area.

  • Heating Cable: Series-type with twin conductors and a 4m cold lead at one end.

  • Cable Composition: The resistance heating wire is encased in a fluoropolymer insulation layer, wrapped in protective metal shielding, and enclosed in a final plastic outer sheath. The twin conductor cable has a final diameter of 2mm.

  • Junction Design: Unique design for hot and cold lead junctions ensures they are 100% foolproof.

Standards and Approvals


  • Standards: Meets all test requirements of IEC 60335.

  • Certifications: CE certified by SGS.

Performance and Benefits


  • Cost-Effective: Provides heat precisely where needed, optimizing heat utilization and minimizing losses.

  • Flexibility: Can be installed in any area or floor layout.

  • Comfort: Close and uniform spacing of heating cables, combined with thermostat controls, allows for precise temperature settings, enhancing comfort.

  • DIY-Friendly: Designed for easy installation with clear instruction manuals and professional technical support.

  • Versatility: Available in various heat loads and sizes to suit various flooring types.

Mat Dimensions


  • Width: 0.5m

  • Length: Dependent on the selected square meter coverage

  • Cable thickness: 2mm

Kit Contents

Kit Includes:

  • Underfloor Heating Sticky Mat (Two individual mats if kit size over 12m2)
  • Floor Primer - a high-performance universal priming/sealing agent suitable for plaster, timber, brick, and block work.
  • Roller - a high-quality roller for applying floor primer to the subfloor
  • Adhesive tape - works to assist in holding a mat or cable in position during installation
  • 2m Floor Sensor Probe Conduit - provides a protective pathway for the sensor probe, connecting to your thermostat
  • Digital thermostat (if selected) - adjust the heat settings and enjoy warm floors through a simple touch of a button

Installation

Installation

Please Note: This is a brief guide. Always refer to the full installation manual for comprehensive instructions.

1. Plan Your Layout:

  • Divide the floor into a series of rectangles. Use these measurements to calculate the number and sizes of mats needed, excluding permanent or static fixtures from your calculations.

2. Prepare the Subfloor:

  • For screed over concrete floors, lay insulation boards to minimize heat loss and ensure quicker warm-up times.

3. Lay the Heating Mat:

  • Start with the first run of the mat. Cut the mat (leaving the cable intact) at the end of each run, turn it 90° or 180°, and continue laying.
  • Once the area is covered, adjust the mat so that the loops are evenly spaced.
  • Secure the mat to the subfloor using the special tape provided.

4. Electrical Connections:

  • Install an RCD fused spur to power the thermostatic controller/programmer and the mat system.
  • Lay the temperature probe from the timer-thermostat onto the floor, position it equidistant between two cable loops, and secure it to the surface.
  • Position the unheated power supply cable from the end of the mat system near the thermostat.
  • Make all necessary connections to the power supply. Run the heaters for no more than 10 minutes to ensure they are heating up properly.

5. Finish the Flooring:

  • Option 1: Apply a thin, self-levelling screed over the mat and allow it to dry completely before laying tiles.
  • Option 2: Directly trowel flexible tile adhesive over the mat and lay the floor tiles.
  • After grouting, let the tile adhesive cure fully before switching on the system.

Manuals

Payment & Security

Payment methods

  • American Express
  • Apple Pay
  • Diners Club
  • Discover
  • Google Pay
  • Klarna
  • Maestro
  • Mastercard
  • PayPal
  • Shop Pay
  • Union Pay
  • Visa

Your payment information is processed securely. We do not store credit card details nor have access to your credit card information.