The world's largest supplier of underfloor heating

Example Systems

We have put together some example scenarios below to help you understand the products you may need for your next Underfloor Heating project. The people and projects below are fictitious but cover a host of real world project questions which may arise.

If you would like to speak to a member of our highly experienced technical or sales team, please don't hesitate to give us a ring.

Sales0844 800 3396

Technical0844 800 3396

Conservatory refurbishment

Project Details

John had an old conservatory containing a single radiator. He wanted to make it into a usable room for use during the winter months. Floor height wasn't an issue as it was a step-down conservatory. John intended on tiling the entire floor and replacing all existing skirting boards.

The conservatory was 3.2m x 5m in size, giving a floor area of 16m2. There was no fixed furniture in the room.

Solution

As the underfloor heating was to be retro fitted over the existing concrete floor, an electric system was used rather than a water system to minimise installation time and disruption.

Taking into account the recommended 10% reduction in mat size; a 14m2, 200w heating mat kit was used to cover the required heating area. This kit was accompanied by 23 x 10mm Tile Backer Boards to prevent any potential downward heat loss and a suitable surface for tiling on.

The existing radiator was to remain, meaning the underfloor heating wasn't being relied upon as the primary heat source for the conservatory.

Installation

John completed the installation himself as he was a keen DIY enthusiast. He only needed a qualified electrician to sign the system off in order to validate his warranty. Doing the install himself kept the install costs to a minimum.

The existing concrete floor was initially sealed using the primer supplied in the heating mat kit. The Tile Backer Boards were then adhered to the floor using the Ultra Rapid Set tile adhesive before being primed themselves. The heating mat was then simply rolled out on top of the backer boards and fixed in place using the tape supplied as part of the kit. John was able to lay his tiles directly over the top of the heating mats.

The entire heating mat installation took 2 days, allowing for the drying time of the primer and the Ultra Rapid Set tile adhesive.

ConservatoryConservatory calculations
ItemCostQuantityTotal
14m2, 200w Heating Mat Kit£396.991£396.99
10mm Tile Backer Boards£10.4923£241.27
Ultra Rapid Set tile adhesive£21.994£87.96
Total cost:£726.22

New Extension

Project Details

Jane had commissioned a construction firm to build an extension on the side of her 4 bedroom detached property. This new extension was intended to expand the existing living area, making a large family room/kitchen diner at the back of the property.

The new area would end up being 6.25m X 8m, giving a total floor area of 50m2, and would have the existing tiles replaced by an engineered wood finish. The fixed furniture in the kitchen covered a floor area of 10m2 reducing the actual heating area to 40m2.

Solution

Jane used a 40m2 Low Profile Water Kit to act as the primary heat source for the new area.

The 4 port manifold, which came as part of the kit, was installed in her utility room at the end of the new family room as this was suitably located near her existing boiler.

A Heatmiser NeoKit Smart Thermostat was installed near the entrance to the new family space giving easy access to the heat control for the room.

Benefits

Jane was able to remove all radiators from the room freeing up a large proportion of her wall space, giving the room a less cluttered feel and allowing her furniture to be placed wherever she wanted.

The Low Profile system only raised her existing floor height by 18mm.

The stylish Heatmiser NeoKit Smart Thermostat is controlled by an iPhone and Android app allowing the temperature of the room to be managed from anywhere.

ExtensionExtension calculations
ItemCostQuantityTotal
40m2, Low Profile Water Kit with Smart Control Thermostat£1,256.981£1,256.98
Approximate installation cost£950.001£950.00
Total cost:£2,206.98

New Build Property

Project Details

Andy is an independent property developer. He was undertaking a project to build a new 4 bedroom detached property with a total floor area of 120m2. The property was fully insulated to current building regulations and would have underfloor heating throughout the entire ground floor.

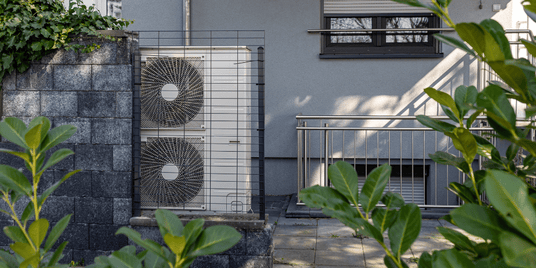
The underfloor heating would be embedded in the concrete screed during the building process and would be run using an Air Source Heat Pump, offering great efficiency and cost effectiveness to his purchaser.

Solution

Our highly experienced sales team supplied a bespoke Water Underfloor Heating system design and quote for Andy's project, covering full pipe layout diagrams and a complete breakdown of all required components. This ensured all required materials were available and minimised wastage was experienced during the project.

Installation

The concrete base was already installed and a suitable thickness of insulation was overlaid in preparation of the pipe work. Once the pipe work was installed as per the designed layout, the finish floor screed of sand and cement, at a thickness of 65mm, was laid to fully embed the heating system in the floor.

Digital thermostats were installed to each individual room to give the home owner full control over the temperature of each room. This gives the purchaser the most economic heating system available. Running the new underfloor heating system from the existing Air Source Heat Pump allows the home owner to heat their property at the lowest cost possible.

New buildNew build calculations
ItemTotal
All components required for project including pipes, pump, manifold, insulation, tools and all connectors.£2,928.71
Total cost:£2,928.71

Bathroom Renovation

Project Details

Colin had a downstairs bathroom he wanted to renovate. The space was 2.5m X 3m giving a total floor space of 7.5m. After removing the floor space of his fixed bathroom furniture, he was left with a total heating area of 5m2.

The room renovation was to include a heated towel rail so the underfloor heating system wasn't being relied on as the primary heat source, but was simply there to provide warm tiles under foot.

The existing door frames and skirting boards were remaining in place during the renovation so it was important there wasn't a significant increase in the floor height.

Solution

The 4.6ms, 150W ProWarm™ Loose Cable Kit was proposed for Colin's underfloor heating requirements as it would make installation in his small and awkwardly shaped bathroom simple and only raise the height of his existing floor by 14mm.

Colin chose the stylish WarmUp™ 3IE thermostat to accompany his new installation. With its Active Energy Management ™ facility, understanding the running costs of the new underfloor heating was simple.

Installation

The concrete floor was first primed, then the XP-PRO insulation boards were adhered to the floor using the Rapid Set tile adhesive. These insulation boards were then primed before the loose cable was laid out and stuck to the insulation boards using the tape included in the kit.

Colin was able to install his tiles directly over the installed cable to ensure the floor height remained as low as possible.